- Make It Yourself Lavender Heart-Shaped Bath Bombs!
- 20 Things You Never Knew About “Down There”
- 12 Best Foods For Those Suffering From Arthritis Pain
- 12 Personal Hygiene Mistakes Almost Everyone Makes (Mom Never Told You About #4!)
- 15 Medicinal Plants And Herbs From The Cherokee People
- 12 Mind-Blowing Benefits Of Drinking Coconut Water During Pregnancy
- 12 Outstanding Winter Foods That Won’t Fatten You Up Like A Christmas Turkey
How to Make Kombucha at Home Cheap and Easy
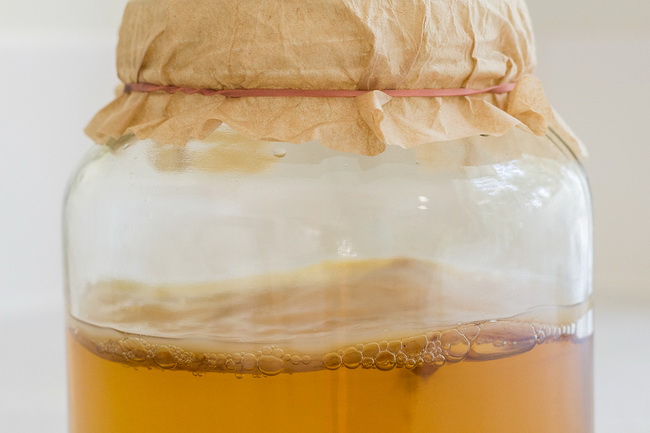
Photo credit: bigstock.com
OK, so if you’ve been reading about how great kombucha is for your health, or if you’ve been paying $4 or more for those bottles of kombucha and you are wondering if you can get it cheaper, or if you are just one of those DIY types that wants to…well…do it yourself, then this is the article you have been waiting for.
If you are one of the few people who hasn’t gotten on the kombucha train, briefly, kombucha is a fermented, sweetened tea that has been around for thousands of years. It has a slightly tangy but sweet flavor that is absolutely delicious. But it has so much more to offer than just a sweet tasty change of beverage: kombucha contains probiotics, glucaric acid, B vitamins, and is loaded with antioxidants. This means kombucha can help detox the liver, give you energy that lasts all day long, improves digestion, supports the immune system, helps with negative feelings such as depression and anxiety, and improves the function of the pancreas, just to name a few. Read more about top reasons why you should drink more kombucha.
This method is called “continuous brew.” As the name suggests, it’s made in batches, then re-started by using a little bit of the liquid from the previous batch and by using a small piece of the SCOBY (Symbiotic Colony of Bacteria and Yeast). This method will give you a much more “fresh” tasting brew and will help your kombucha brew faster. There are other means of making kombucha, but this method is nutritional and practical. It gives you less of a risk of developing mold or having your kombucha contaminated. It’s more acidic, which makes it less inviting to bacteria. This method will also give you a more consistent supply of kombucha, such as a few bottles each day, rather than having one large batch all at one time that might go bad if no one drinks it all.
You will need to have a kombucha container with a spigot so you can remove some of your kombucha without disturbing the rest. It should be between 1 and 5 gallons in size (for a family, look for a 5 gallon size, if it’s just you or you and your mate, then 1 gallon is probably good) and it should be either a glass or porcelain container. Other types of containers, such as plastic, metal, or ceramic, cause problems with the brew. Be sure it has a spigot near the bottom of the container. Be certain that the spigot is not lined with metal on the inside! Metal will kill off the bacteria.
Your container should have a cover but not necessarily an airtight cover. You want to allow some of the gasses to escape, but you want to keep out dust, bacteria, flies, ants, and fruit flies. If you find a great container but it lacks a lid, you can always use a tightly woven towel or even a couple coffee filters secured with a rubber band. Many people find that 2 gallon Mason jars with a spigot work well. If you find a container that works well but the spigot is metal or lined with metal, replace it with a plastic container. It sounds complicated, but once you start looking, you will be surprised at the variety of containers that will work for you and how readily available they are.
Continue to Page 2
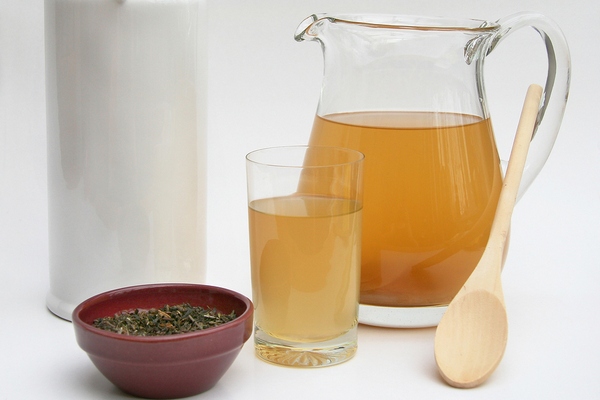
Photo credit: bigstock
Now you will need your own SCOBY. This is a living, growing colony of bacteria. Unfortunately, you can’t just walk down to the supermarket and pick one up (not yet, anyway.) There are a couple of ways you can get one. If you know someone who is already brewing their own kombucha, as them for a “baby.” Chances are they will be only too glad to give you one. Every couple of batches, your SCOBY has a “baby” which can be used to start making more (another batch) of kombucha. This is the best way to get your own SCOBY.
However, if you don’t know anyone who is making kombucha, you can always order one online. Be careful who you order from, however, as SCOBYs are available online at all kinds of places, and you really don’t know what they contain. Use a trusted source, generally online sites that sell only kombucha accessories and SCOBYs. It might seem a bit pricey to begin with, but remember that you will only need to buy it once. After that, your SCOBY will make babies and it just keeps on growing and reproducing. Sort of like buying one pair of rabbits. That’s really all you will ever need!
Once you have your container and your SCOBY, you are ready to go! Let’s double check the list to be sure you have everything you need to get started:
- Glass or ceramic jar with non-metal spigot
- A wooden stirring spoon or stick (NEVER use metal!)
- A lid or some coffee filters, cheesecloth, or kitchen towel for a lid
- A large rubber band to secure the lid if you are making your own
- Your SCOBY. If you ordered it online, be sure to rehydrate it according to the instructions before you begin
- Tea
- Sugar
- Starter tea from a previous batch of kombucha (if a friend has some- don’t use bottled kombucha) otherwise, you can use some white vinegar or apple cider vinegar
- Filtered water (don’t use distilled water)
OK, are you ready?
Continue to Page 2
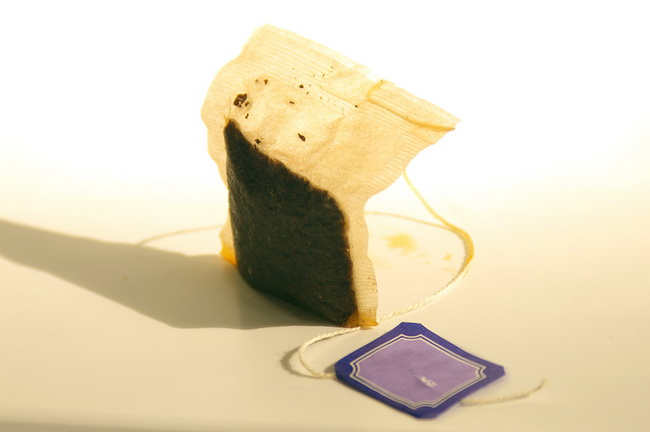
Photo credit: bigstock.com
Instructions:
- Make your tea. You can use 2 “family size” tea bags or 8 to 10 regular tea bags or 2 tablespoons of loose tea, to one gallon of water (if you have a larger container, you can double or triple this recipe.) Any type of plain old tea will do.
- Add one cup of sugar to the water. Do not use honey or other types of sweeteners, it won’t work.
- Allow the tea to cool to room temperature. Be sure it’s completely cool or you will kill the SCOBY.
- Pour the cool tea into the glass jar. You will need to leave about 20 percent of room in the jar, so don’t fill to capacity. Add ½ cup of starter kombucha or vinegar.
- Wash your hands well, and then gently place the SCOBY on top of the liquid. It should float, but if it falls to the bottom, that’s OK. Don’t touch the liquid!
- Cover the jar. Flies love this mixture, so be sure they can’t get inside.
- Put the jar in a warm place in the kitchen. An ideal temperature is between 70 and 75 degrees.
- Allow it to sit and ferment for 7 days. Pour a little bit in a cup and see if it tastes right. It should be tart, but still sweet. If it’s too tart, let it sit another couple days.
That’s it! Your kombucha is ready for another brew! So now dispense this brew into several quart size Mason jars (with plastic lids!) and be sure you leave a bit of room at the top.
Your kombucha is ready to drink! You can repeat the process above, using your SCOBY.
You only need to clean the container and spigot when necessary. For example, if the spigot becomes clogged with yeast or if you notice that a great deal of yeast has accumulated in the bottom of the container. When you need to clean it, simply remove some of the kombucha and the SCOBY and put it in another container. Clean the container and spigot, preferably with white vinegar. If you use soap, be sure you rinse it very, very, very well. Soap residue will kill your SCOBY. Once your container and spigot is clean, put the SCOBY and kombucha back inside the container, and continue making a new batch of kombucha!
Your SCOBY will eventually grow in size until it becomes quite large. This is the time to use a NON-METAL cutting device, such as a plastic knife, and distribute it to your friends. Passing on a good thing, like SCOBY, is what friendship is all about, right?
SEE ALSO: Want a Healthy Sweet Drink? Check Out This Medicinal Turmeric Tea Recipe!
Kombucha is like any other recipe, there are hundreds of variations. This is a basic recipe and works well for most beginners, but don’t be afraid to have fun experimenting with it.
Happy fermenting!
Video: